Editor’s note: As we’ve always said here at Font Awesome, WordPress and Font Awesome are two great tastes that can go great together! And fortunately, there are a lot of talented developers out there, making the Font Awesome experience in WordPress even more robust. In this post, guest blogger and developer Matt Keys shows us the ropes on using their Font Awesome WordPress plugin!
For those who may be unfamiliar, Advanced Custom Fields (ACF) is a powerful tool used by millions to create robust content editing interfaces in WordPress. ACF PRO includes extra fields and features to better develop websites quicker and more smoothly. ACF includes PHP Blocks, Repeatable Fields, Page Building tools, Media Galleries and Custom Options Pages.
Integrating Font Awesome icons into ACF makes selecting and using Font Awesome icons on your WordPress site easier and more accessible for your content editors.
In this article, we’ll look at using the free Advanced Custom Fields: Font Awesome plugin so you can start working with Font Awesome icons in your WordPress site right away.
Before we get started, a few things are required including:
- A WordPress site.
- Advanced Custom Fields plugin. This plugin comes in a free and paid “Pro” version. Either version will integrate with Font Awesome, but some of the features we discuss in this guide will utilize Pro features.
- Advanced Custom Fields: Font Awesome The Font Awesome companion plugin for ACF.
A Font Awesome account is recommended, but not required.
This guide also assumes you have experience working with Advanced Custom Fields. If this is your first time using it, you should check out the getting started documentation first.
Installation and Configuration
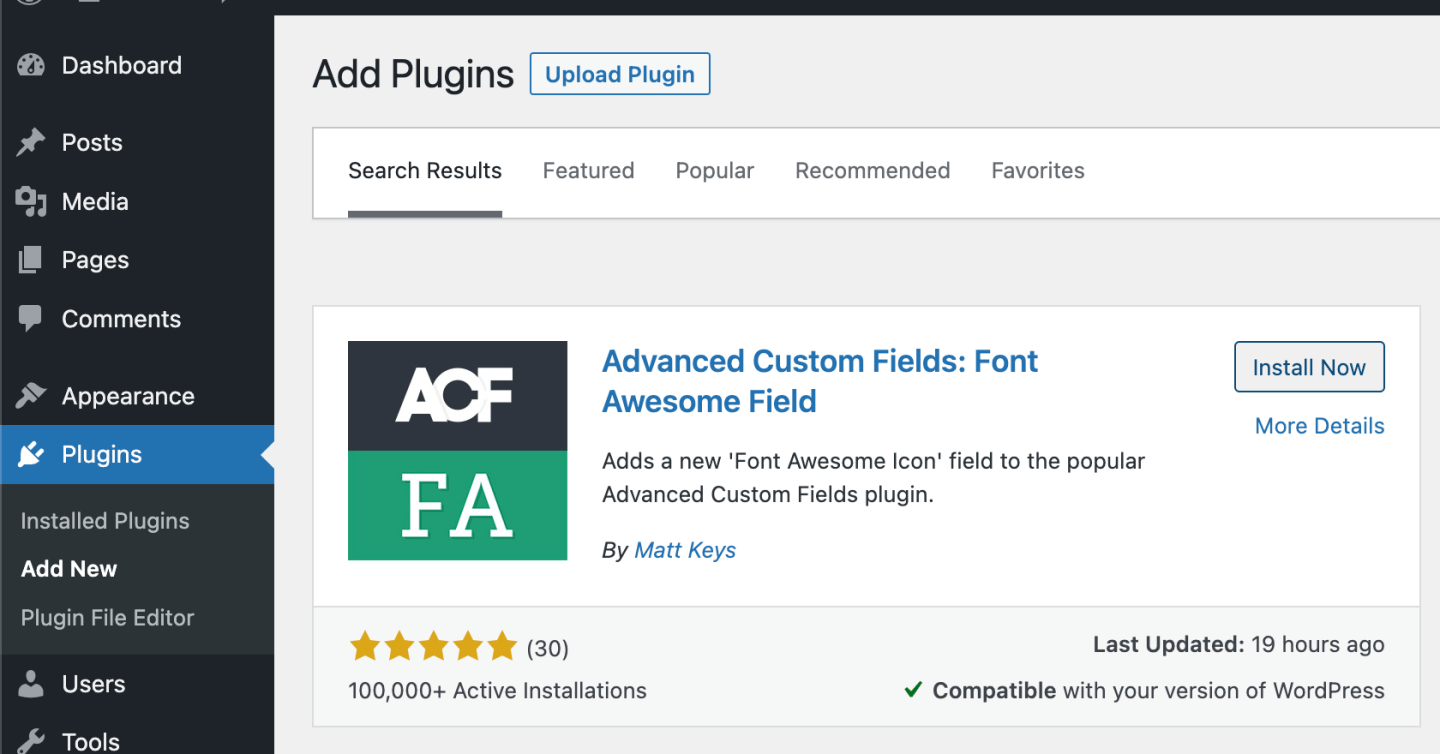
The Advanced Custom Fields: Font Awesome plugin is available through the WordPress plugin repository, which you can install from your WP Admin dashboard.
The plugin comes ready to use with Font Awesome 6 free icons out of the box without any configuration. But to get the best experience, you’ll want to configure the settings.
Navigate to Custom Fields > Font Awesome Settings in your WP admin area.
From here, you can enter the API Token from your Font Awesome Account page. After saving your API Token, the plugin automatically lists your Font Awesome Kits. These Kits can be selected and used throughout the plugin whenever searching for icons and displaying them to your visitors.
Notification Bar Example (Basic)
The possibilities with Advanced Custom Fields are nearly endless, but first, let’s cover a basic way someone might want to use Font Awesome icons with Advanced Custom Fields. Let’s imagine that someone wants to put a notification bar at the top of their pages to let their visitors know something important.
Creating Our Fields
We’ll create a new field group called “Notification Bar.”

We have just two fields, our Font Awesome Icon field and a Text Area field for the notification.
Let’s go through the settings for the Font Awesome field.
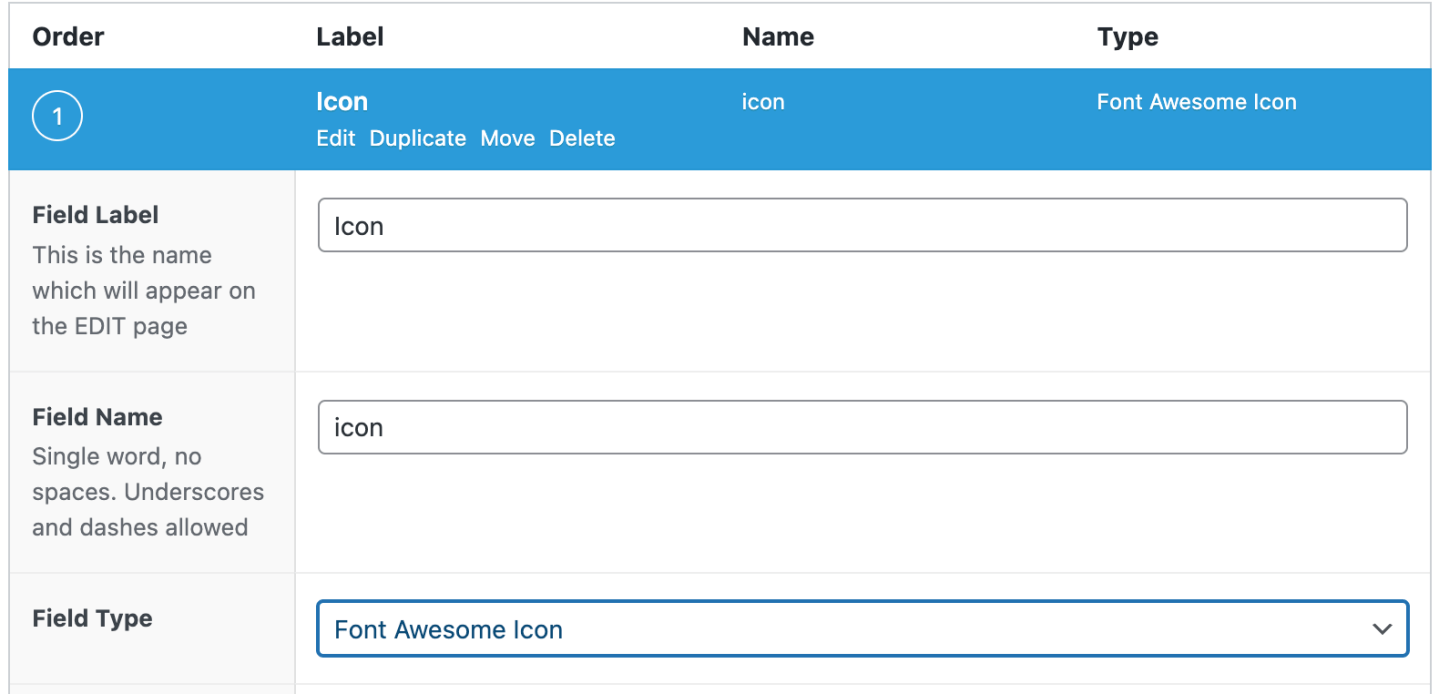
We have the Field Label and Field Name. These will be what your editors see when using this field and how you access the field in your theme templates.
The field type should be “Font Awesome Icon.”

Next, you can choose which Font Awesome Icon Sets you want to be available when choosing your icons. More info on that “Custom Icon Set” option later!

Optionally set a Default Icon that will be used if your editor doesn’t select their own icon.

Choose how you want to work with the selected icon in your templates.
Icon Element will give you the HTML you are used to working with, like:
<i class="fa-duotone fa-message-exclamation" aria-hidden="true"></i>Icon Class will give you:
fa-duotone fa-message-exclamationIcon Unicode will give you:
Icon Object will provide you with all of the information the plugin has on the selected icon:
stdClass Object (
[element] => <i class="fa-duotone fa-message-exclamation" aria-hidden="true"></i>
[class] => fa-duotone fa-message-exclamation
[id] => message-exclamation
[prefix] => fa-duotone
[style] => duotone
[hex] => \f4a5
[unicode] => 
)

Choose if you want this plugin to automatically add the Font Awesome assets needed to show icons on the frontend of your site. A benefit of letting the plugin handle this is that it will only load the icon assets when needed (there is an icon to display). It will either load from the CDN or use your Kit if you have one configured. You can leave this setting at “No” if you plan to handle loading these resources yourself.
Using Our Fields
ACF field groups appear wherever you assign them when creating your field group. I have our “Notification Bar” field group appearing on all pages in this demo. So navigating to any of the pages in WP admin will show our fields.
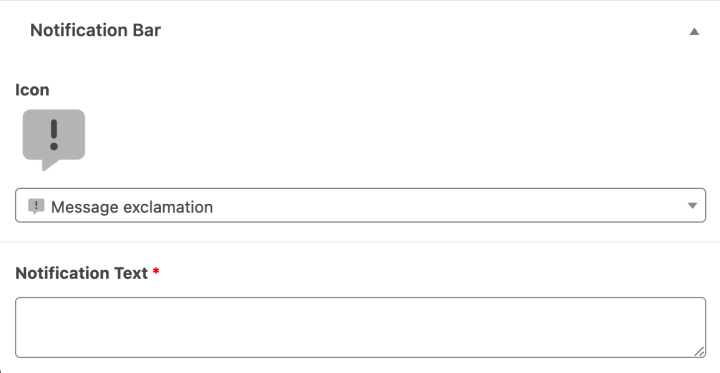
Here we see our default icon and our notification text field. As an example, we’ll add a notification that in-person classes are canceled due to bad weather and choose an appropriate icon to grab people’s attention.
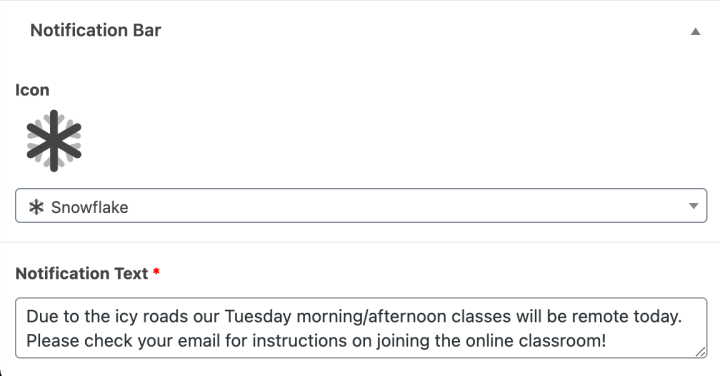
Displaying Our Fields

To display our fields, we will edit our theme templates. In this case, I’ll be adding the following code to our page template:
<div class="notification-bar">
    <div class="icon">
        <?php the_field( 'icon' ); ?>
    </div>
    <div class="notification-text">
        <p><?php the_field( 'notification_text' ); ?></p>
    </div>
</div>
And I’ll be adding these CSS rules to our themes stylesheet:
<style>
  .notification-bar {
    display: flex;
    flex-direction: row;
    justify-content: space-between;
    max-width: 900px;
    margin: 20px auto;
    padding: 10px 20px;
    background: cornflowerblue;
    border-radius: 10px;
  }
  .notification-bar .icon {
    margin: auto 20px auto 0;
  }
  .notification-bar i {
    color: blue;
    font-size: 50px;
  }
  .notification-bar p {
    color: white;
    line-height:   1.5;
  }
</style>
Theme Settings — Social Media Link Builder (More Advanced)
Okay, so now we have seen a basic example using ACF and Font Awesome. Let’s use ACF Pro to create a social media icon builder for our site’s footer. We will create a “Theme General Settings” page for that purpose. These settings should apply globally to all pages, so we will want to manage them in a single place.
Creating Our Settings Page
We will use the ACF functionality to create a new custom settings page by adding the following code to our theme functions.php. The new settings page will appear in our WP admin area.
if( function_exists('acf_add_options_page') ) {
  acf_add_options_page([
    'page_title' => 'Theme General Settings',
    'menu_title' => 'Theme Settings',
    'menu_slug' => 'theme-general-settings',
    'capability' => 'edit_posts',
    'redirect' => false
  ]);
}
Creating Our Fields
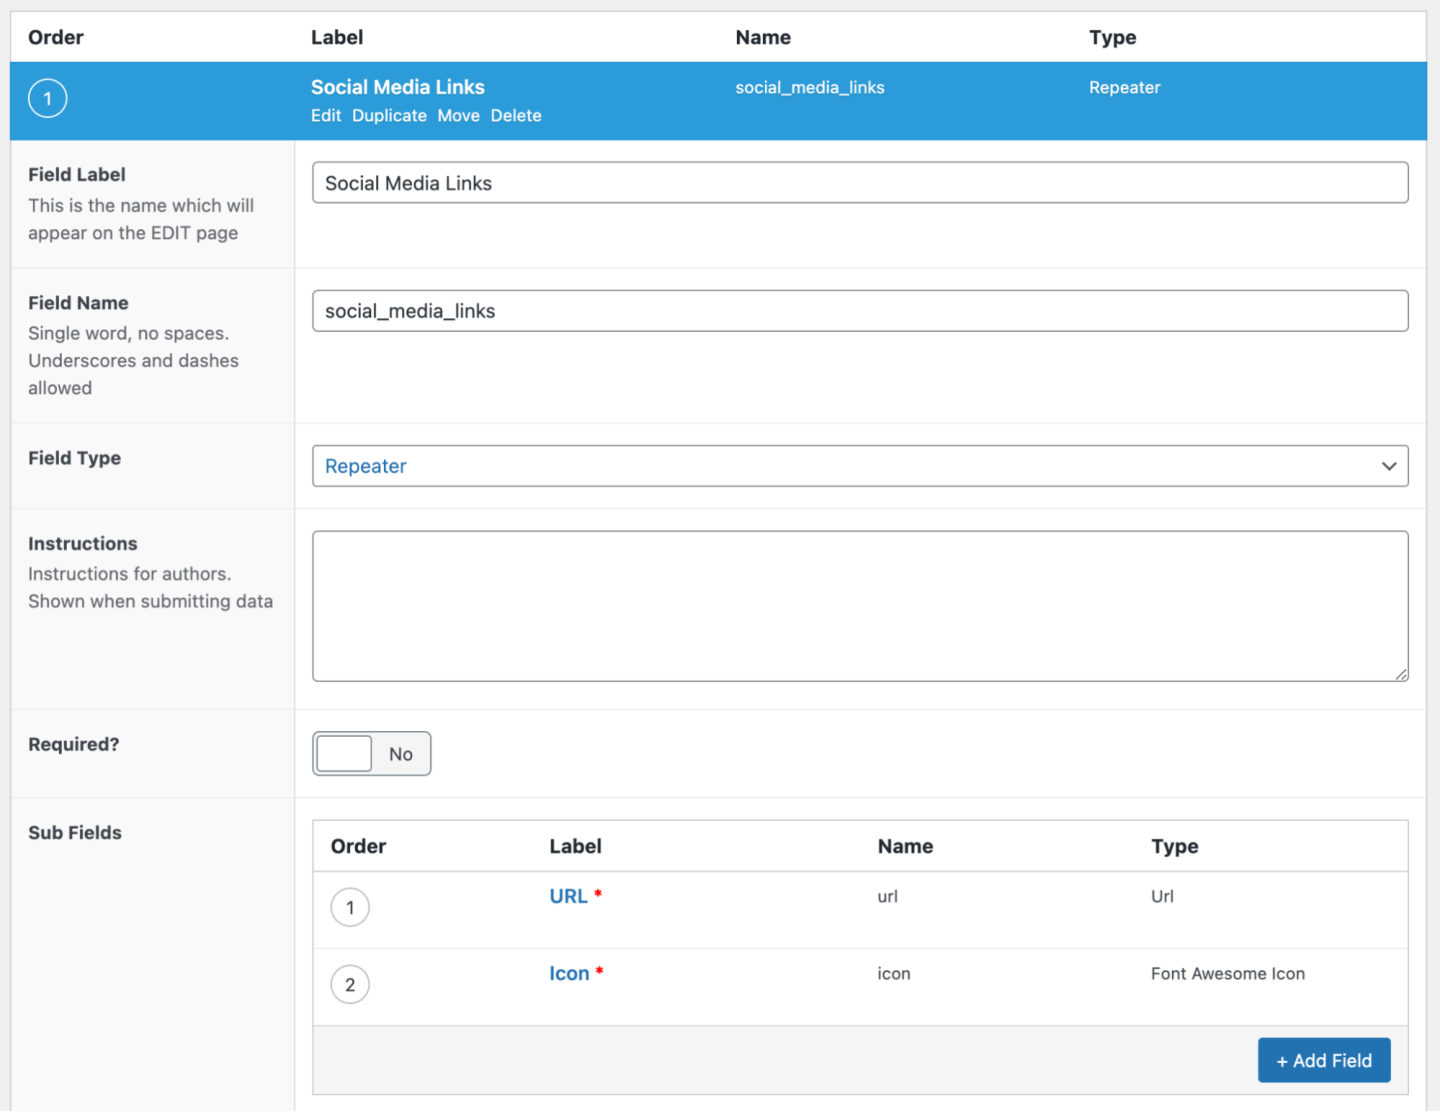
We will use an ACF repeater field in our Social Media Links field group. The repeater will have two subfields, a URL and an Icon.

We’ll configure our Font Awesome Icon field to use only the Brands icon set as that will contain all of the icons we are looking for.

And we will set our field group to show up on our new “Theme General Settings” page.
Using Our Fields
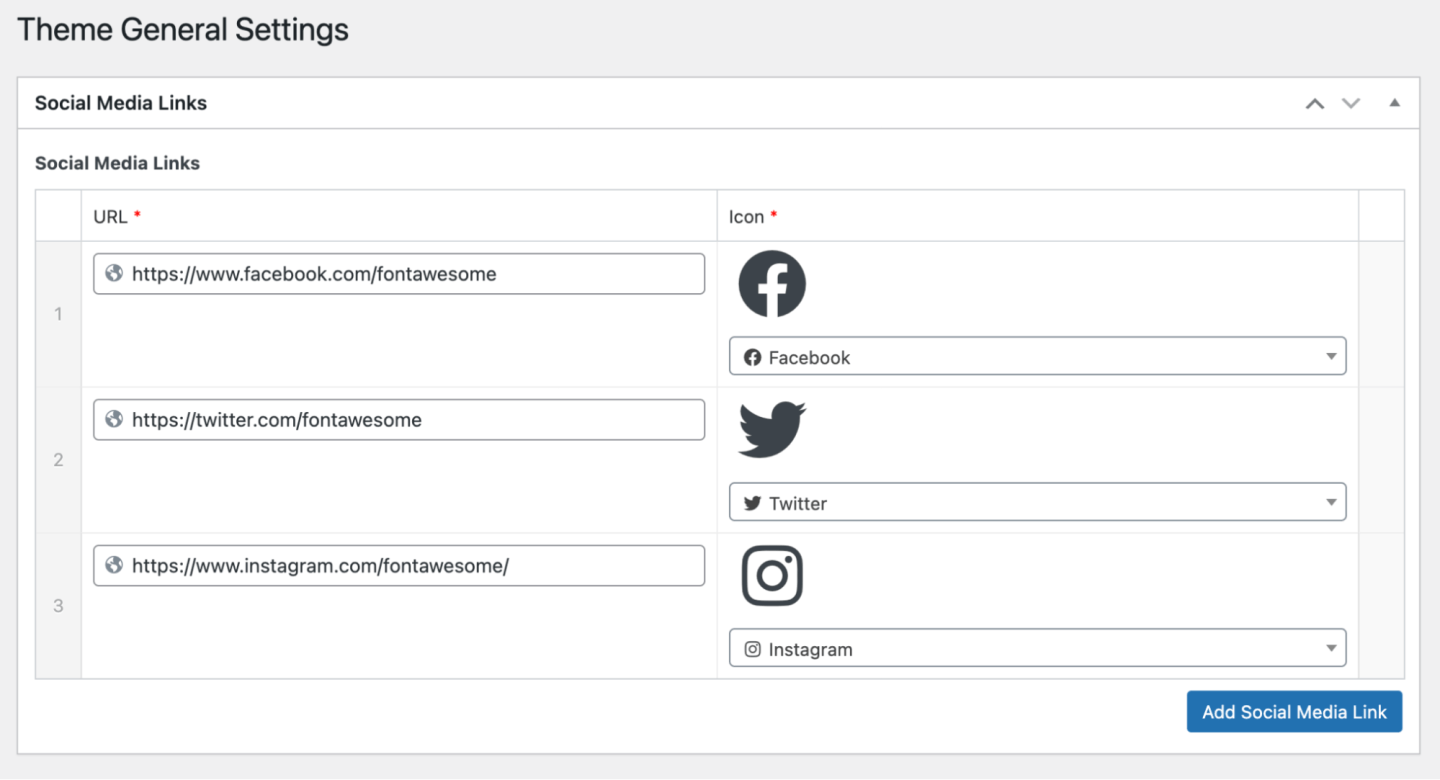
Now our editors can add as many rows as they need. Adding their social media URLs and selecting an appropriate icon for each.
Displaying Our Fields

To display our fields, we will edit our theme templates. In this case, I’ll be adding the following code to the footer template:
<div class="social-media-links">
    <?php
        if ( have_rows( 'social_media_links', 'option' ) ) :
            while( have_rows( 'social_media_links', 'option' ) ) : the_row();
                ?>
                <div class="social-media-link">
                    <a href="<?php the_sub_field( 'url' ); ?>" target="_blank">
                        <?php the_sub_field( 'icon' ); ?>
                    </a>
                </div>
                <?php
            endwhile;
        endif;
    ?>
</div>
And I’ll be adding these CSS rules to our themes stylesheet:
<style>
  .social-media-links {
    display: flex;
    flex-direction: row;
    justify-content: flex-end;
  }
  .social-media-link + .social-media-link {
    margin-left: 10px;
  }
  .social-media-link i {
    font-size: 50px;
    color: chocolate;
    opacity: 0.6;
    font-size: 50px;
    transition: opacity 0.5s;
  }
  .social-media-link:hover i {
    opacity: 1;
  }
</style>
Custom Icon Set Builder
While still thinking about our example above, let’s see how to make the icon selection even easier using custom icon sets.
Custom icon sets allow you to limit the available icon choices in your ACF Font Awesome field to a predefined list of icons you choose. You can find the Icon Set Builder at the bottom of the Font Awesome Settings page.
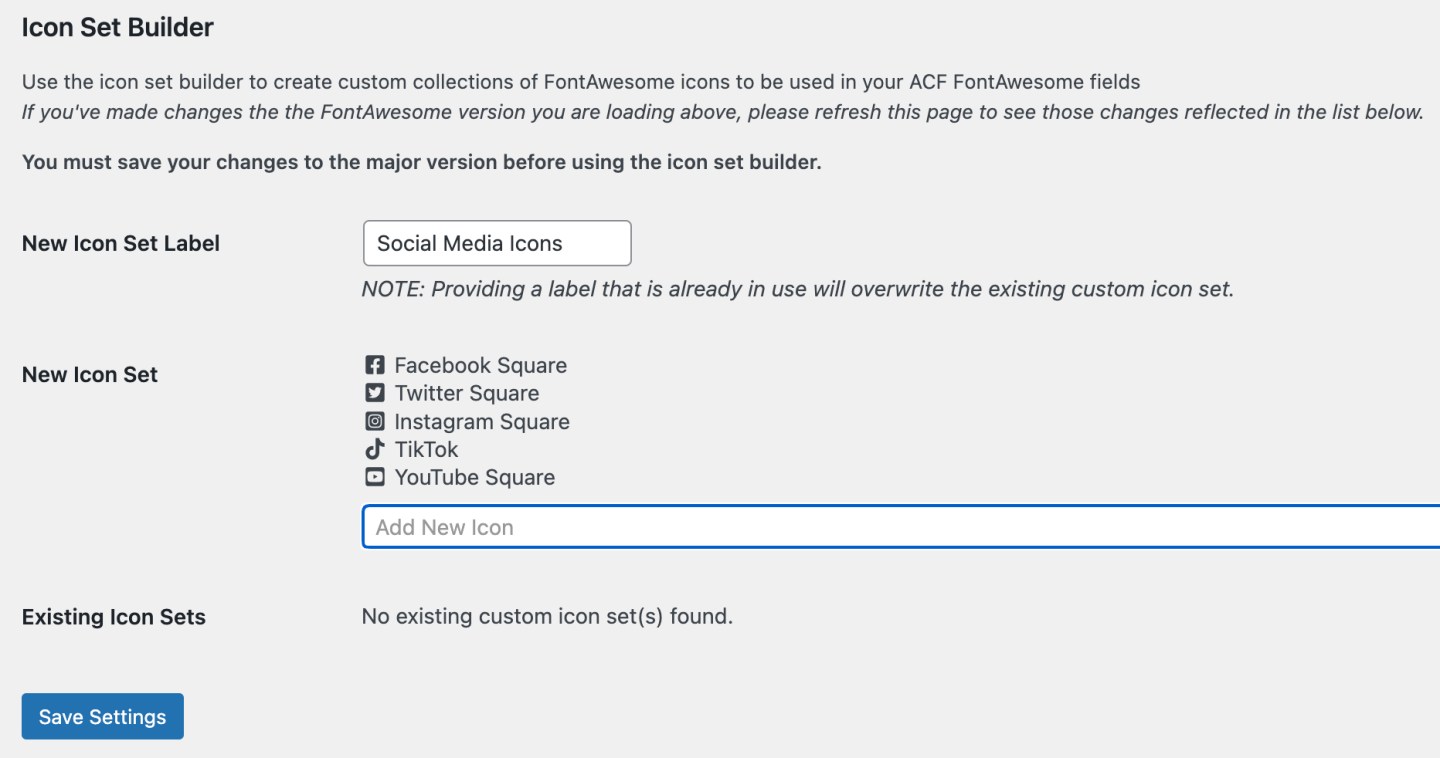
So let’s create a custom icon set of social media icons we want to make available in our field.
- Navigate to Custom Fields > Font Awesome Settings in your WP admin area
- We will name our new icon set “Social Media Icons.”
- We’ll add only the icons we want our users to pick from
- And save!
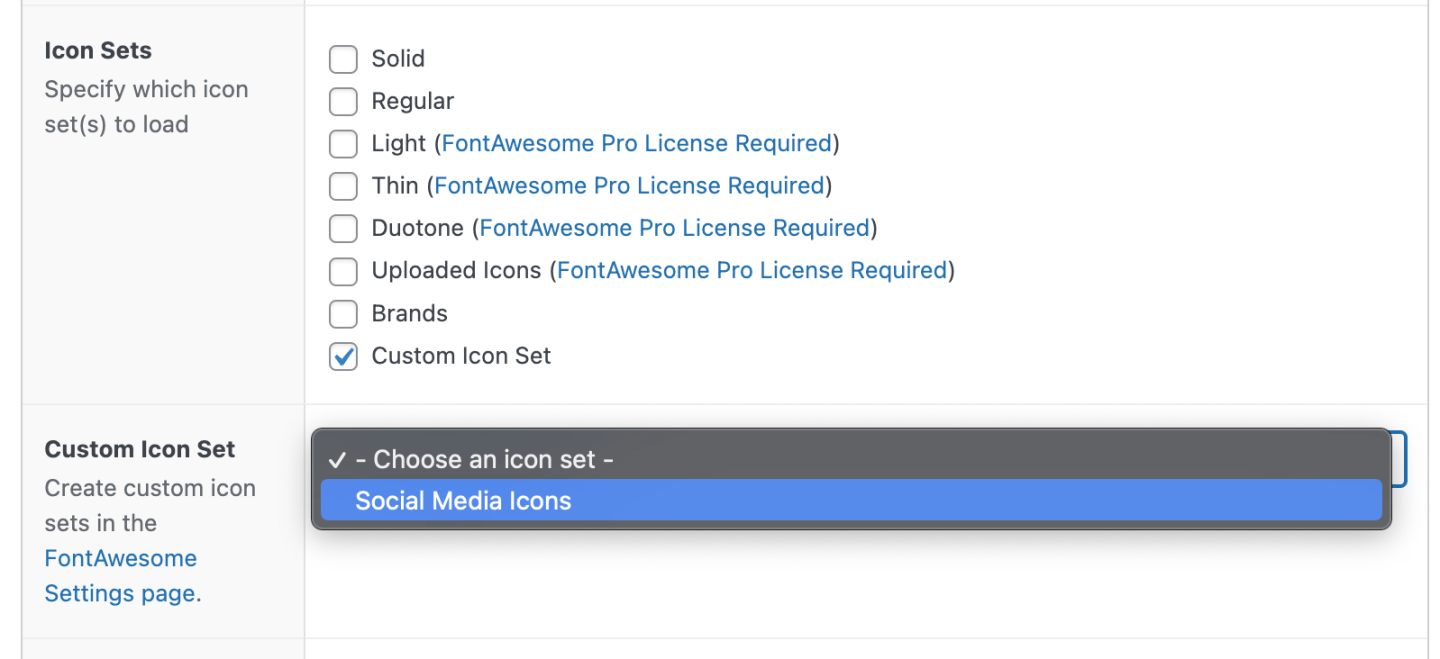
Now let’s update the icon set in our Social Media Link Builder from above to use our new custom icon set.
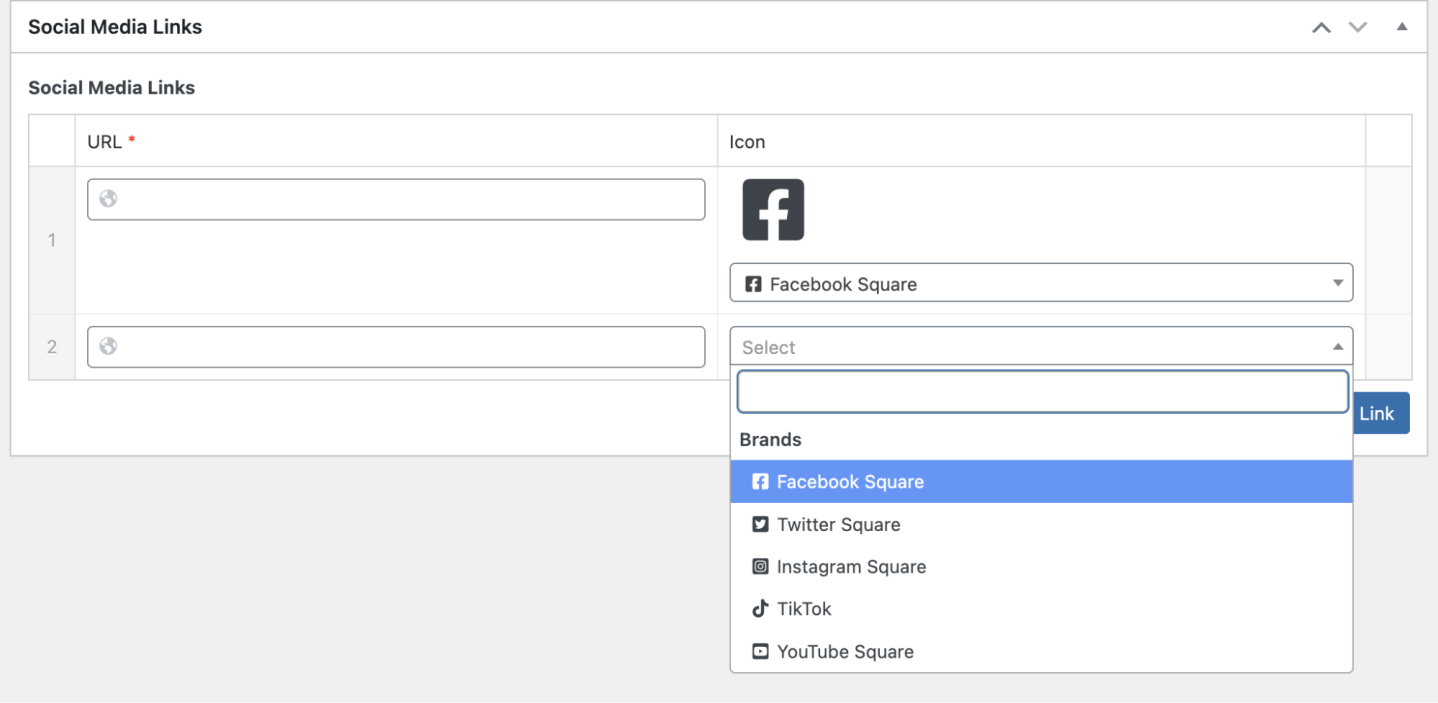
When it comes time to choose our social media icons, we have all the icons we need and nothing we don’t!
Be creative!
The possibilities are nearly endless when working with ACF and Font Awesome. Use Font Awesome fields to punch up your navigation with icons. Add icons to your product feature pages. Anywhere you need Font Awesome icons, ACF and Font Awesome will make it easier for you and your editors!


