C is for
[CSS Pseudo-elements] that’s good enough for me!cookie
With the release of a new beta feature for Font Awesome Pro subscribers, now you can use a custom icon as CSS Pseudo-elements with Kit Icon Upload.
With our initial release of Kit Icon Upload, you could upload your icons only to SVG kits. But SVG kits don’t support the use of CSS Pseudo-elements because of how common it is to stumble over a poor performance scenario. Here’s what can happen:
The JavaScript that powers the SVG rendering scans the web page, looking for pseudo-elements to turn into SVGs. If there are many elements or dynamic element changes, the browser gets sluggish due to all the scanning.
But, CSS Pseudo-elements perform great with web fonts. And now they work with your web fonts (#winning!), the ones currently being built on-the-fly for your own Webfont Kit Icon Uploads!
Add Custom Icons With a CDN-powered Kit
Still not sure where to use this feature? Here’s one common scenario: putting your own icons on menu items in a content management system like WordPress. In some cases, you can control the menu’s style through CSS, even if controlling the HTML markup used for the menus is too cumbersome or not an option.
Often a menu like that is structured in the HTML as an unordered list (<ul>) of items (<li>). Wouldn’t it be great to style those menu item elements by adding your custom icons provided by your CDN-powered Font Awesome Webfont Kit?
Add Custom CSS styles to your WordPress
For example, let’s say I have a site called TheRaddestCookies.com, that displays a cookie menu highlighting different kinds of cookies available for sale on the site. I could set up the Font Awesome WordPress plugin to Use a Kit and choose one of my Pro Webfont Kits for loading.
Then I add these CSS rules to my theme’s style.css file to show a cookie icon before each of those menu items:
#menu-item-19 .sub-menu a::before {
  content: ‘\f546’;
  font-family: “Font Awesome 5 Pro”;
  font-weight: 900;
  margin: 0.5em;
}Pro-tip: This CSS rule selects the ::before pseudo-element on any <a> element that’s a child of an element with a class of sub-menu, where that sub-menu is a child of the menu element with id “menu-item-19”. (I inspected the HTML to figure out which classes and id were being used to layout the menu I want to style.) Then, on that selected pseudo-element, I followed the guidelines over in the Font Awesome pseudo-element docs to set the properties to display the cookie-bite icon (Unicode f546) in the Solid style (font-weight 900) from the “Font Awesome 5 Pro” font family.
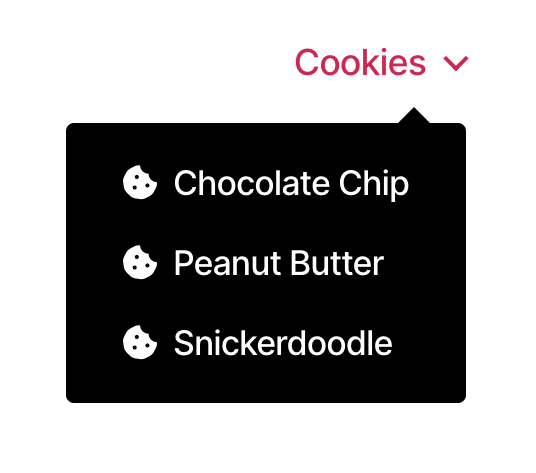
Now when I hover over that menu, I see cookie icons. Yum!

Chocolate Chip? Peanut Butter? Snickerdoodle? Yes, Please!
But then I think: I like how the standard cookie-bite icon has what looks like chocolate chips on them, but I’d prefer to use a different icon for the Peanut Butter and Snickerdoodle items because they don’t have chocolate chips!
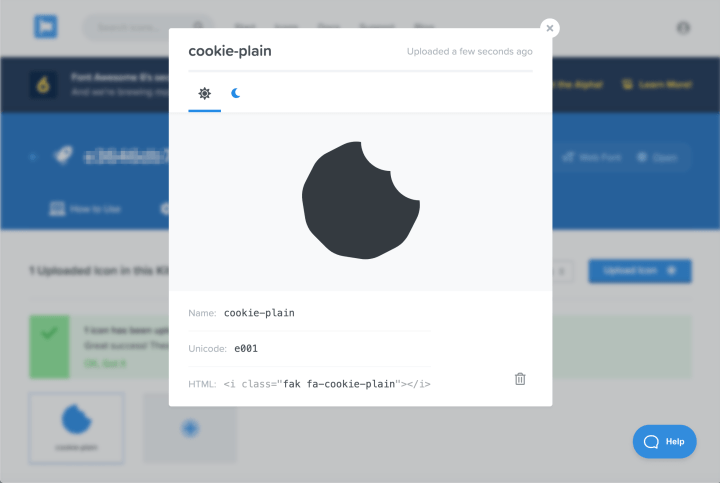
So, I edit that cookie-bite icon, remove the parts that look like chips, and then upload the resulting SVG to my Pro Webfont Kit. Like any cooking show, I’m just going to pull this one already done from the oven. Tada!

Plain? Well, a cookie’s a cookie.
I’ll note the assigned Unicode of e001, and use that to adjust my WordPress theme’s style.css like this:
#menu-item-19 .sub-menu a::before {
  content: "\e001";
  font-family: "Font Awesome Kit";
  margin: 0.5em;
}
#menu-item-19 .sub-menu li.menu-item-16 a::before {
  content: "\f564";
  font-family: "Font Awesome 5 Pro";
  font-weight: 900;
}
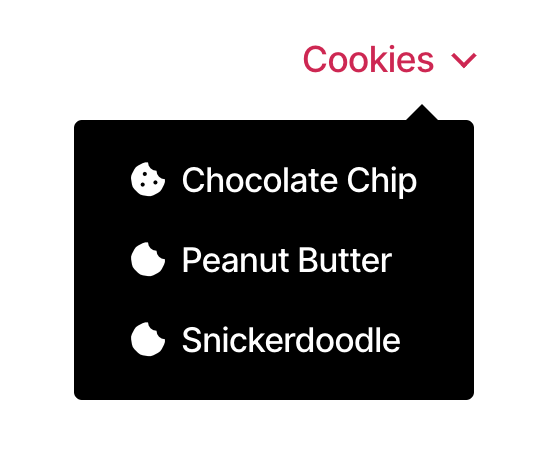
The first CSS rule now uses my custom cookie-plain icon with Unicode e001 by default for any links in items under the matching menu. The second rule makes a more specific selection: a link in the menu item with class menu-item-16, because I saw that was the class assigned to the Chocolate Chip item in the HTML. For that item, it still uses the standard cookie-bite icon.
Voilà!

Chocolate Chip FTW! (Snickerdoodle and peanut butter are pretty alright too.)
There are several ways to add custom CSS styles to your WordPress site besides editing your theme’s style.css file. You do you. For example, I could have added this custom CSS instead by going to the WordPress admin dashboard, and on the Appearance menu, selecting “Customize,” and then “Additional CSS.”
That’s How You Use a Custom Icon as CSS Pseudo-elements
There you have it. That’s how you use a custom icon as a CSS Pseudo-element. Now it’s your turn. Try uploading your own icons to your Pro Webfont kits. If you’re not on Font Awesome Pro yet, upgrade to unlock this feature along with lots of other goodies!


